Scanner selection
Step: 1
Before you can start using paperCMD you have to select your scanner and set it up. To achieve this, please choose the tab „Settings“ and then the button „Select source“. If there is no scanner in the „Select Source“ dialog or the desired scanner is not listed, then this is because of a 32Bit /64Bit mismatch. You have either a 32 Bit (x86) paperCMD and a 64 Bit (x64) scanner driver or the other way around. Please make sure scanner driver and paperCMD version match up..
Continue with the scanner setup after this step.
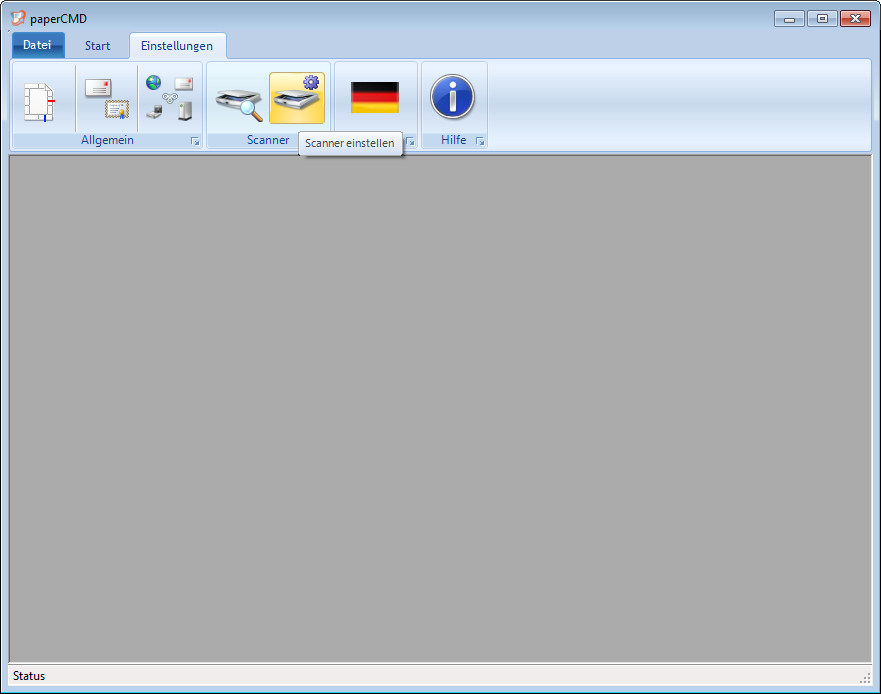
Scanner setup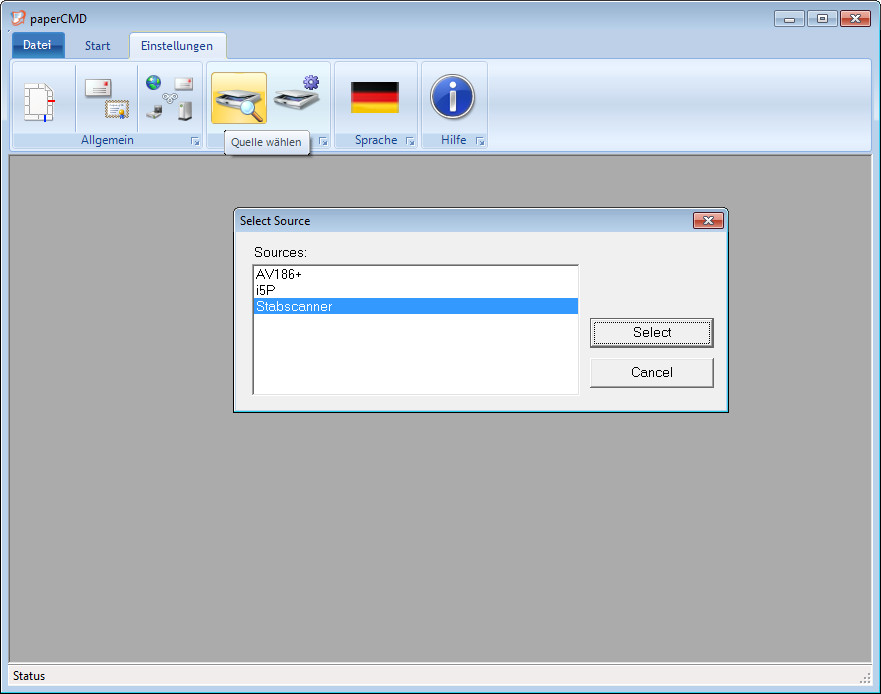
Scanner setup
Step: 2
To set up your scanner select the tab „Settings“ and then click on the button „Setup Scanner“.
The setup dialog is different for each scanner and therefore it can not be shown here. Please set up your scanner in way that is scans color images. Only this way paperCMD can recognize the markers by their color. You can decide later to store your documents in grayscale or monochrome, but at first the documents have to be scanned in color. Resolution, size, orientation and duplex are irrelevant to paperCMD and can be choosen according to your requirements.
Please continue with calibration.
Calibration
Calibration
Step: 3
In order to regognize the markers fast and accurate while at the same time support all the different combinations of textmarkers, papers and scanners on the market, the patented paperCMD algorithm uses a calibration method to tailor itself to your specific needs.
To calibrate you need an empty sheet of paper of the same type you want to use later, e.g. recycling paper or plain white office paper. On this sheet you should provide 3 color samples with the same type of marker you want to use later. Pleas use a single stroke to provide these samples.
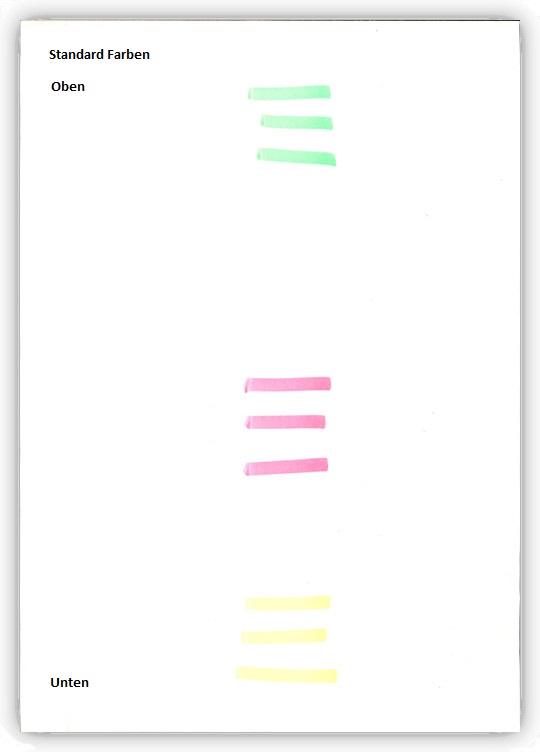
continue
Calibration
continuation (Example)
This sheet is now scanned to optimize the algorithm to your paper, highlighters and scanner. Make sure the sheet is placed correctly into the scanner and that the scanner is online. Now choose the button „Sorter Settings“ in the tab „Settings“ Choose „Read markers from scanner“ the opening dialog.
The sample sheet is scanned and displayed in a separate dialog. The colors that are recognized in top-to-bottom order and suggested for usage. The colors that you accepted for usage will be shown in the dialog „Sorter Settings“.
After successful calibration you should continue with setting up your filings.
Setup filings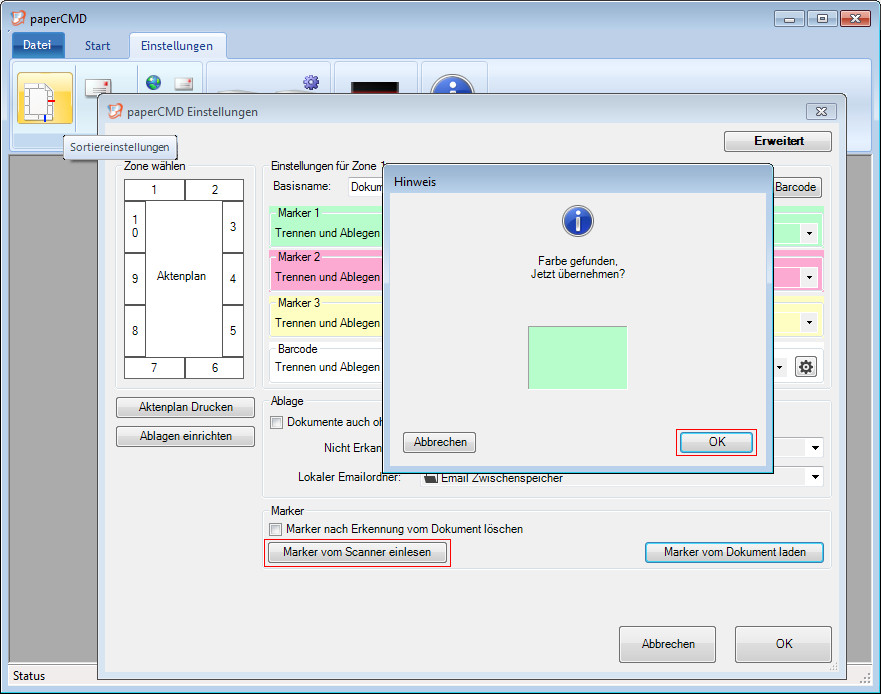
Setup filings
Step: 4
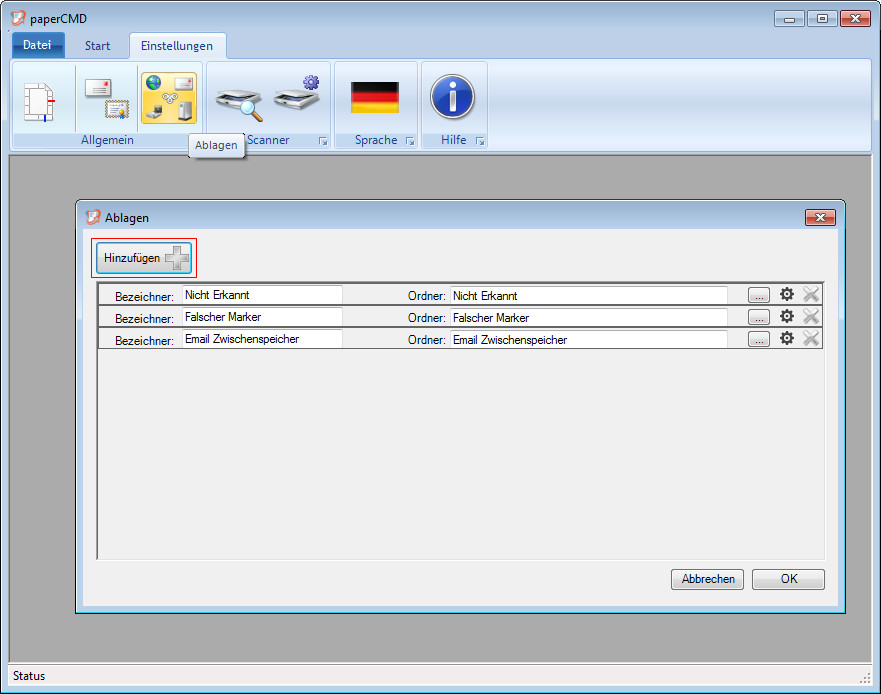
To guide the documents to their destination and at the same time determine file formats and other settings paperCMD uses the concept of filings. Analog to the physical filing on your desk or in cabinets you can set the destination (a folder on your computer or e.g. an email, file format (TIF or PDF with sub-formats), resolution, and color depth of the documents. You may also opt to sign the documents.
For this quick start please add two „folder“ type of filings. In order to accomplish this please choose the button „Filings“ from the tab „Settings“. Now click on „Add +“.
continue
Setup filings
continuation
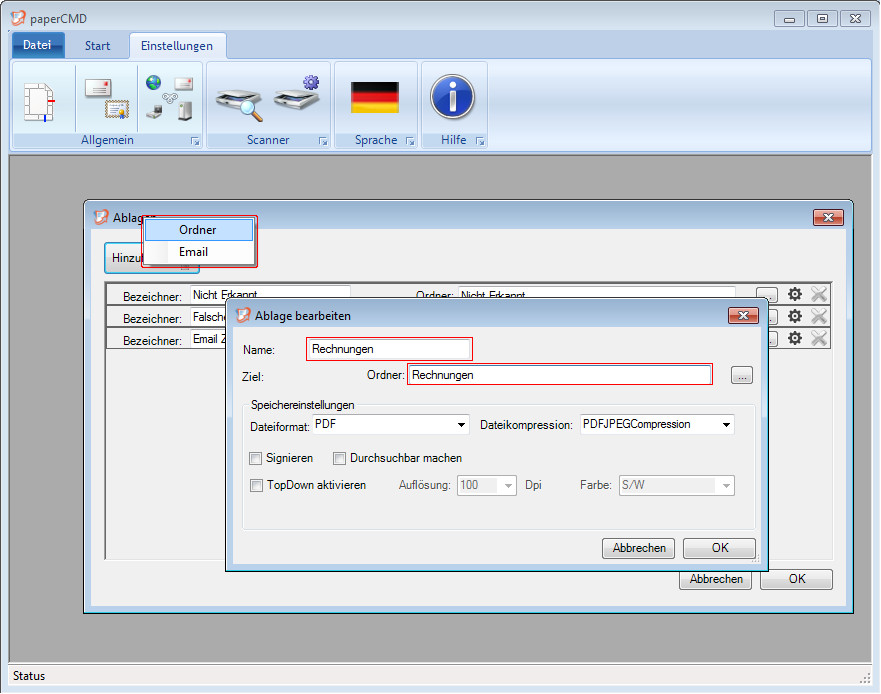
Now select „Folder“ and put „Invoices“ into the text boxes for „Name“ and „Folder“. Please leave all other settings untouched.
Please repeat the last steps, this time for „Delivery Notes“.
continue
Setup filings
continuation
Your dialog should look like the example on the right side:
Click on „OK“ to confirm your settings . The filings are now set up and you may continue with setting up your filing plan.
Set up the filing plan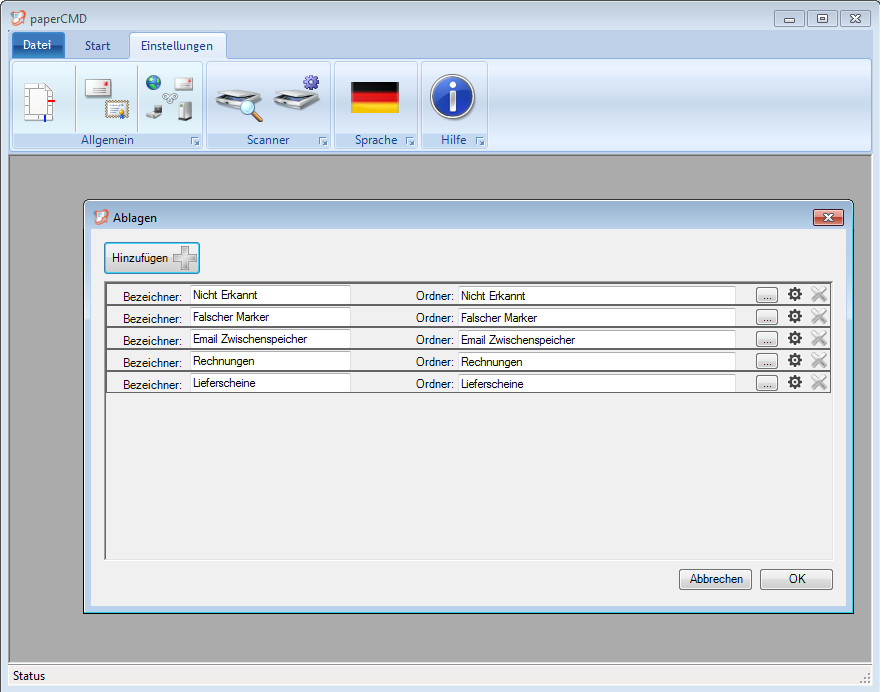
Set up the filing plan
Step: 5
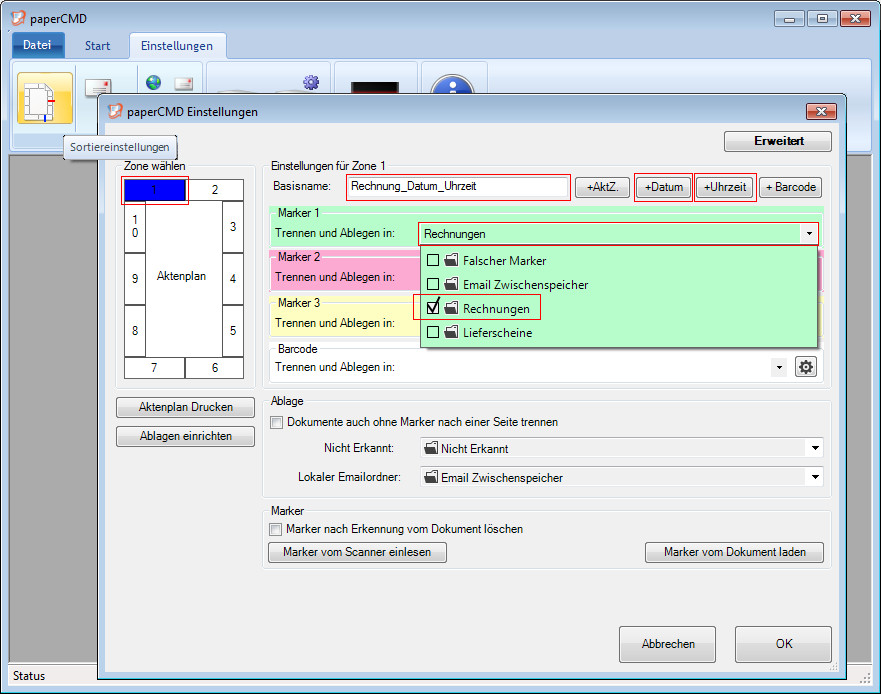
We call the link between markers on a document and filings and document names „filing plan“, similar to your physical filing structure. To set up your filing plan select the button „Sorter Settings“ from the tab „Settings“. In the „Sorter Settings“ dialog please click on „Zone 1 „ in the group box „Select Zone“. The the settings for Zone 1 are shown. Choose „Invoice“ as a „Base Name“ and after that click on „+Date“ and +Time“. From the colored select boxes choose the „Invoices“ filing for the color that you would like to use for invoices. You should see a picture similar to this. Please take note that the colors and the order may be different depending on your calibration sheet.
continue
Set up the filing plan
continuation
Now select „Zone 2“ in the „Select Zone“ group box. Check that the settings are shown for Zone 2. Please enter the name „Delivery_Notes“ "+Date", "+Time" and check the target filing corresponding to the settings entered for invoices.
After this step all settings are done. For your work at the scanner you can print out the filing plan for quick and easy reference.
Now you just need to mark the documents and paperCMD can do its job.
Mark Documents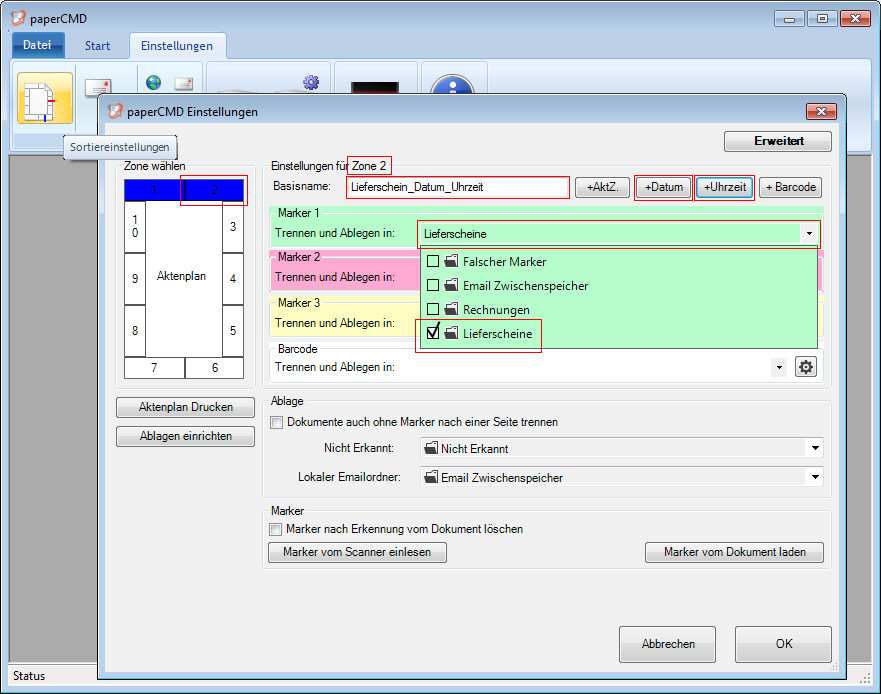
Mark Documents
Step: 6
After all options are set up, you can now mark your documents according to your filing plan, to have them sorted and filed.Please mark the documents the way outlined in the filing plan with an approximately 1.5 cm (0.6“) long stroke orthogonal to the edge of the paper in the corresponding color. In our example we have set that a „green“ mark in „zone 1“ should be recognized as an invoice and a „green“ mark in „zone 2“ shall be an delivery note. Please bear in mind that you have to mark only the first page of a multi-page document. All trailing pages will be stored with the first page into the same document until the next marker is found.
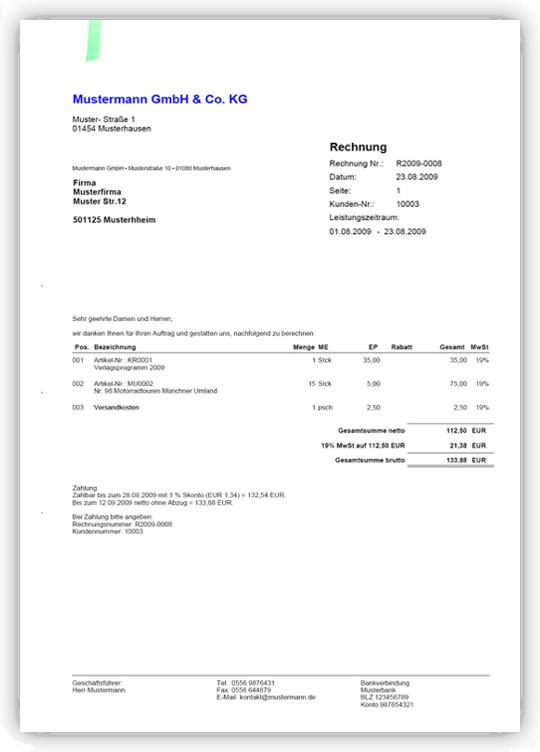
Here is an example for an „invoice“.
continue
Mark Documents
continuation
As soon as you have the first (or only) page of all documents, you can put them into the scanner stacked onto each other. Press „Scan“ in the tab „Start“ to start the operation. The pages are scanned and paperCMD creates splitted documents automatically. "Invoices" will be named „Invoice_<date>_<time>.pdf“ and will be stored into the folder „documents\paperCMD\Invoices“ on your computer. "Delivery Notes" will be handled accordingly. The scanned and sorted documents will be shown on screen and can be magnified with a mouse click. When you are satisfied with the results, click on „Send all“. Now the documents will be transformed into the final file format and moved to their final destination. This happens as a „move“ operation and is compatible with directory watchdogs..
After all is set and done, you can now put paperCMD's performance to the test. Try a bigger stack to test the maximum speed. Choose „make searchable“ in the filing setting to get your documents processed by an OCR engine. Add an email account to the settings and try an email filing. You may add an additional marker to your „Invoice“ configuration in a different zone and the document will be filed and send by email. There are a lot of possibilities to increase your productivity with paperCMD. Test to your hearts content.
We wish you a pleasant and successful experience with paperCMD!
About the Features
more than speed and a high detection rate...
Features
The future of scanning is just few clicks ahead of you
What do you waiting for...?